Pageviews past week

The cold world of skimo & alpine climbing

The cold world of skimo & alpine climbing

Thursday, April 5, 2012

Opps! Free gear for April?

I've been out climbing and forgot about the April give away. Ya gotta be a member to win.  A Blue Ice chalk bag, a Boa leash and one other piece of fun climber's kit will be given away.  Three chances to win!


OK then!


The free gear?

The Blue Ice chalk bag?  One of the very few in North America I suspect!
It goes to: Melissa Harms


The Blue Ice Boa Leash?   
It goes to: Gordon Green


And an amazing assortment of MOJO Cliff bars goes to : Kelly


 Send me an email..one way or another and I'll get your prise mailed out to you.  Till then there is always the next drawing.

Climbing Packs Part 2

“Perfection is achieved not when there is nothing left to add, but when there is nothing left to take away” – Antoine de Saint-Exupery


The very first model Karrimore pack, the Grimpeur, on a snow arete low on the Innominata route, Mont Blanc © rif, Aug 1967
Climbers: Rob Ferguson  (photo by Pete Cartwright)


The Grimpeur pictured above is not a lot different in design simplicity from what I am using for a pack today.  S. House and C. Haley are using similar, very basic pack designs as well.

Two recent posts on one of the climbing forums this past week...

"SO you ask what is so great about a $500 pack that falls apart then? The ride and the W/NW Dyneema material. Despite one of the lower ice axe buckles coming clear off, one of the buckles on the lid snapping in half when i was unlatching it, the buckles that hold the lid on coming undone along with various other buckles just coming undone for no apparent reason and loosing them in the snow...."

and my  totally biased response....
"Man that is so pathetic it makes me want to actually just give you a quality made pack. But then you could buy one for $150 delivered so I'll restrain myself."

What I didn't want this series of  blog posts to be was a advertisement for the custom packs I use.  They are after all custom packs.  But then all my packs I pay retail for and have yet to pay more than $250 for any one of them, including delivery.   Generally the packs I use the most are about half that price, including the ones Dave and I are using and pictured below.  So it is hard to ignore the stark differences in price and quality.   I'm not here to  bash anyone either just a little reality check from the packs I saw being used in the last month or so.  That said I will eventually point out some pretty bad examples imo of current packs.  So don't kill the messenger here.   I have no dog in the fight just reporting what I saw and my opinions on the topic. My suggestion to you as a smart consumer here is read between the lines...take a close look at what you see and  decide according to your own needs.

I have seen and used a lot of packs over the years.  The design and workmanship I still find fascinating.  If you are new to climbing specific packs (yes there is such an animal) or have yet to find one that really fits you hopefully this group of blogs on climbing packs will help you get more for your dollar and the best pack for your own needs.

As I repeat often and honestly mean,  "what I use may not be what you want to use and what works for me may not work for you."      And it pays to remember I am not trying to sell you anything.  The info and opinions here is free.  The real question is.....is the information useful to you?

The same custom CCW packs are pictured here made from different fabrics.
2lbs 7oz. for the red ballistics cloth below and  2 lbs. even for the black Spectra ripstop pack pictured above.


Mark Twight @

"June 24-26 Steve House, Scott Backes and I climbed the Czech Direct on Denali. The first ascent, in 1986, required 11 days and approximately 1000' of fixed rope. Kevin Mahoney and Ben Gilmore made the second ascent over 7 days in May, 2000. We climbed it in 60 hours non-stop. We carried no bivouac gear apart from a 2lb Down or Polarguard jacket each and two MSR XGK stoves in order to melt snow fast enough to stay hydrated. Starting with just 22oz of fuel for each, these ran out of gas at hour 48. A total of 55lbs was split between two packs, (18lbs were water), leaving the leader pack-free to move fast.

The Czech Direct is 9000' high but only 5500' present any climbing difficulty: ice climbing up to 90°+ and rock to UIAA V+ (USA 5.9). We belayed 31 (60m) pitches, simul-climbed some terrain and soloed the rest including the first 1000' where the Czechs belayed 9 pitches. After crossing the bergschrund at 6am, we passed the Czech's 2nd bivouac site at 8am and their 3rd bivy by 11 and reached their 4th at 2pm where we brewed and ate. The climbing was fantastic and there was a lot of it. The Czech topo showed 24 pitches of UIAA III (USA 5.4) or harder. Ice conditions were such that we never holstered our tools -- but we did have to file them twice during the climb."


In his book Extreme Alpinism, Twight for better or worse defined how much a climbing pack should weigh.

The magic number?  Less than 3.8 pounds. 

Twight also said, "frameless packs work fine for loads up to 35# and carrying more than 35# usually guarantees failure" 


There are two points I am trying to make here.  The first is most of us carry too much crap around and don't pay attention to what it is we put in our packs.  The other is the pack materials (fabric used ), the weight and the costs don't have to be exotic or astronomical to have a awesome climbing pack.  Here is why.

The pack I am using today is based on a 70's vintage Chouinard FISH pack.   The FISH name came from the smell of the early ballistics nylon used for that pack's body.  When I finally retired the pack in the '90s the shoulder strap seams were literally rotting and falling apart.  But the pack body was still intact and usable after hundreds of miles of hiking and thousands of vertical feet of climbing and hundreds of feet of hauling.

The heavily modified FISH pack's weight in ballistics nylon with a foam pad?  1lb 15oz.

Bottom line?  Nothing wrong with good pack cloth fabrics even today.  Yes they add some weight to a climbing pack compared to the super lwts.   But in a 35/40 Liter sack size like what I am using it is 7 oz of long term durability.  It is easy to get well under 3# on a realistic climbing size pack these days.

My personal climbing pack and its design here:

More on climbing packs in general here:

I like most I suspect I have been easily swayed by the outdoor industry and their paid advertising.  I see gear being used on hard climbs, I want to emulate those climbers and their climbs and a good place to start I figure is having like gear.  Right?  Well it turns out that much of that gear is either given freely or given at such discounts that it is hard not to accept the favor if it is something you will use.  So the guys with the biggest budgets get their products show cased more often in the climbing rags, climbing forums  and on places like this,  climbing blogs.  That gets spun into the best makers even adding labels from the biggest players on to some of the highest quality goods.  Or the weakest attempts at gaining credibility simply claiming it is your product being used when it clearly (to those who really know) it isn't. 


OK lets talk a bit about pack design.  Climbing packs should be simple and sturdy in construction.  The design and pattern for a good climbing pack is how ever pretty complicated.

Just one example of pattern cutting and complicated or simple design efforts.  A pear shaped pack on top and a cylindrical pack shape on the bottom.  Each has its place.

Good look at the S shaped curved back panel pattern from a BI Warthog.   Simple pack complicated design.


All three of  these packs have only two main vertical seams and are made from two main pieces of fabric (front and back)  plus the bottom piece which is the third.  


No where near the total but try counting the load bearing seams on this pack.  The number of pieces of fabric and the resulting seams left untaped in this particular pack surprised me.

Try counting the number of seams and fabric pieces in your favorite pack.  Every seam is a weak point in the pack's design.  It is much better to cut a perfect pattern than it is to build a shaped pattern by using many different pieces of fabric and sewing them together.  Even the very best fabrics easily fail at a poorly sewn seam.   Use a poorly designed pattern, add bad sewing and quality control and you end up with packs that fall apart in use.


This from an email exchange earlier in the week with one of my climbing partners:

"I bought my white one 30L NWD (which is now tearing apart and all taped up) in April 2010. Its my "go to" alpine multi day pack pretty much in summer in Cascades.  Oh, did I tell you what I found the other day?  One of the shoulder straps attachment seams is half torn apart which implies I need to fix it (again!). I am afraid it would not survive another trip."

Mind you this is a less than 2 year old,  current production, $500 retail pack the owner is discussing with me!   And it is not the same $500 pack being discussed on an Internet forum at the top of this blog!  Just the same US domestic manufacturer.  I've seen this particular $500 NWD pack in person and truthfully...it is duct tape holding it together.   I wouldn't personally take it on another climb.  Happily it is not my pack or my choice.  'Cuz I would be pretty pissed.   I'm being kind here by not posting the pictures.

Take a look inside your favorite pack.

Here are some examples of well built packs and their stitching and tape jobs.   The FISH pack not so much.  But hard to argue its durability after 20 years of hard climbing and ZERO required repairs.  I included the last pack pictured from a Canadian manufacture that uses multiple seams and fabric pieces with an exceptionally well fitting pattern that is sewn extremely well.  Lots of ways to build a quality pack.  Pick your own wisely.

It is worth noting the bit of fabric here to back up the externally sewn accessory box/X  sewing pattern.  The tape job on the seam is also well done imo.

 This one's sewing is very clean and much more likely to hold up because of multiple stitch lines.  These are the shoulder strap tacks.  It is also a well worn 3 year old pack.  In fact it is the the red ballistics nylon one I have posted any number of pictures of in the past.  The clones to this pack in Spectra and Dyneema ripstop look the same internally.   All the sewing and taping is very clean and tidy.
 

Clean taped seams here.  And just as likely cleanly sew seams under the tape.  Note the dbl seams under the tape and the double sewn over seams just outside the tape on this pack bottom.  All of that is why these packs will take year after year of abuse and stay usable.  Not a season or two of use and a roll of duct tape to keep them just functionable. 


Here is my 30+ plus year old Chouinard FISH pack.  Good enough sewing and no taped seams...which was the norm for a $40 pack in the late 70's.   The sewing looked like shit but lasted  through 20 years of hard use.  But why would you put up with this level of  workmanship today at 5 or worse yet 10 times the price.
I won't. 


This one is from a Canadian manufacture that uses multiple seams and fabric pieces with an exceptionally well fitting pattern that is sewn extremely well.  This one is 5+ years old and used hard.  Internally it still looks new.


A climbing pack in use!

Alley Swinton climbing, Dave Searle photo

Let me leave you with some facts.  The actual weights of packs I have had here on my digital scale.

CCW 35l custom climbing sack, Spectra rip stop, 2# even (based on a Ozone)
Same CCW in ballistics nylon 2# 7oz
Same CCW in Dyneema r/s 1# 12oz
REI Flash 18L 9.2oz 
Arcteryx Khazri 35l  2# 13oz 
CCW Chaos, custom 21" back, Spectra r/s, 3# 10oz
Jensen 4oz. red pack cloth LG 1# 11oz
Jensen green 8oz Cordura 2#3oz
Cilo 30L in 210d Dyneema r/s 17" back  2# 9oz

Part 3 of "climbing packs" will be a discussion of what IMO you really need on a alpine climbing specific sac.


Wednesday, April 4, 2012

Ice screw rebores?


http://www.youtube.com/watch?v=s8BElNmp048

Average?  2300# at failure for a stubby.

Thanks Matt!

Fitting and the detailing on climbing packs?


If you look around the Internet for so called "climbing packs" the prices might well run between $30 and darn near $1000.  Yep..a $1000!   Of those listed damn few actually will fulfill the hype as real "climbing packs" in my opinion.

This will be the first of a several part discussion on climbing packs.

If you were paying $200 for a pair of shoes would you accept a pair of size 11s for your size 9 feet?  Of course not.  "Dumb Ass" question isn't it?  How about a $25 pair of flip flops?  Would you take a size 6 for your size 11s?  Likely same answer..."dumb ass" question. Why bother to ask or answer?

There are a few things in the out door industry that really bug me.   They bug me because over the years they have gotten worse instead of better.   Climbing is generally a sport that people grow out of.  The rare exceptions are Fred Becky, a few of the great Alpinists that are still alive and likely the majority of the the crew over at Supertopo :)

From my perspective boot technology hasn't made any huge advances in 30 years.  Climbing packs...nothing there either.  Crampons....sheesh don't get me started on crampons!

But today the topic is packs.  More specifically climbing packs, their build quality and how to fit one so it does what is should for you in the mountains.

Any climbing pack is going to be a soft frame.  Generally a really soft frame as in only a foam pad stuffed in some manner into the  inside the pack.  The frame doesn't mean a lot (but it is important) but what does mean a lot is the length of the back panel.  That back panel must fit your physical measurements or the pack will be pretty useless.

In turn the correctly fit pack and your own anatomy will define how big the pack is.   When you are talking climbing packs don't expect a 18L pack to fit you well if you are 6'3" or a 45L pack to be any better if you are 5'2".

Most of us will be best served with packs in the 30 (1800) to 40 (2500) Liter range for actual climbing while still having something useful for getting back and forth from the climbs.  Why those sizes?  Because most backs will fit between those pack volume sizes.

John Bouchard:
"To get an idea of how important each pound is when you’re climbing hard climbs where you can’t afford to haul the pack, try doing pullups with weights around your waist. Start with 5 lbs. and keep increasing in 5 lb. increments. For me, each 5 lbs. decreases my performance by 20%!"

http://www.wildthingsgear.com/wild-things/stories/light-is-right.html

If you want to actually climb difficult technical ground, limit the weight in your pack and clothing to 20% of you actual body weight.  For me that is 38# total or less.  38# for boots, clothing, water, food and the technical gear!   If you climb with me and you weigh 50# less we don't carry equal loads.  If your total body weight is 125 pounds your entire kit from sleeping bag to boots will be smaller and lighter.   That will make up for some of what you carry but not all.   Your total load's weight should be 25 pounds!   It is much much easier in the alpine to have a partner of similar size physically for a number of good reasons.  This is just one of them.   If you want to climb hard, climb smart first.

Sure you can climb with more weight.  But you will want to know how to haul a pack if you do. Or get your partner to climb in a pack and just take one pack.  Here are a couple of tips for fitting a  pack.  First fill the pack up.  Not overly stuffed just "full".  I tend to use ropes for this.  Ropes run 6 to 8 pounds for a 60m rope.  With these size packs 3 or 4 ropes max will fill one up and give a soft but firm pack with an appropriate amount of weight to try them on for sizing.

With the straps loose the thing should sit on the top of your butt.  You should have full range of motion with your head and neck with a helmet on.  Can you look up and not touch the pack?  You need to be able to.

This is a good fit length wise on the back.  The pack is sitting on the top of the butt.

Hip belt is too high here and way too wide for the weight it will carry
It only takes an inch or too either way on th back panel length to make a pack almost totally useless.

Bounce the pack up a bit and suck in the hip belt.  It is a climbing pack so ditch the damn padded hip/waist belts that are 3 inches or wider.  They are worthless with any weight you can actually climb in.   Quick wayt to tell if the pack designer has a clue about climbing in fact.    A simple 1 1/2" or 2" webbing waist belt is enough for anything you'll want to carry up to 3 days or so.  Less will do as well if the pack actually fits.  You don't want to constrict your hips or abs when you tighten the waist belt.  Use soem common sense and let your body tell you if the pack fits.
 
I get called a "girl" on occasion.  But from what I have seen a woman's climbing pack should be fitted no different than a man's.  The ladies are more difficult to fit in the shoulders but the fit should be the same imo.   Start with the correct pack length and then go from there.  I am not a woman so I can't say that with any certainty.  And one of my partners has yet to be convinced she can wear a hip belt of that size and in that position.   Her worry is keeping the freedom of her hip joints.  She has a new pack coming that is being built on the ideas I have posted here.  As are all of my custom made packs.  The experience from that new pack should tell us a lot.   So there will be a woman's insight following up on packs and pack fitting in the near future.   Ladies, if you disagree with what I am writing here please tell me and why? 

Once you have tighened the waist belt let it settle down where it is the most comfortable for you.  That is generally on your hip bones...and a inch or two below your Iliac crest and setting on the top of your ass for support.  Yes, both boys and girls have enough ass to support a climbing pack's weight.

http://en.wikipedia.org/wiki/Iliac_crest


My finger indicates the top of my Iliac crest.  My hip belt is most comfortable and able to carry a majority of the pack's weight if it is located several inches below the Iliac crest.


This should be a comfortable position on your hips as it is where most of the weight will be, or should be anyway.   Carried by your hips not your shoulders...even with just 20% or LESS of your body weight involved.   Then pull in the shoulder straps.   Take about 40% (or less) of the pack's weight on to your shoulders now.  But not too tight.  Don't lift the pack off your hips.   Do you still have full head clearance with a helmet?  If the answer is no...ditch the pack...it sucks for climbing.

This is OK but getting a little high on the back..so likely too long of back panel and we shouldn't be seeing air between pack and back.


This is a better fit, note the curve on the shoulder straps going up and then over the shoulders.
My body position here sucks for the picture as I am bent over and my head down so the pack looks short.  It isn't.


Make sure the pack straps come out of the pack narrow enough that they will stay on your shoulders.
I am 6'1" and 185.  And I can still find shoulder straps that are way to wide for my shoulders and how they have developed.  I don't have tiny shoulders but I have a hard time getting a tank top to stay on them unless it is tight.  My shoulders aren't flat on top.  If the pack straps are too wide coming out of the pack they are simply unusable for me.  I need 2" between them, but prefer no more.  You might need more or less.

If you are still good, with a 60/40 split on the weight now,  check your sternum strap.  It is the last adjustment.  Too high or low and too tight will cut your breathing.  Pay attention here.  Get it adjusted right.  Big chested men and women will have a problem with this one if the shoulder straps and sternum strap aren't able to be moved and adjusted right.  The sternum strap will really aid in how secure the pack feels on your back and your balance because of it.  Get it right and a decent size pack is easy too climb and ski in.  You'll seldom notice it if you limit yourself to that 20% over all weight  number.

Too short of shoulder straps and too high of sternum strap

Correctly fit shoulder straps and a better position on me for the sternum strap

Depending on how a woman is built the sternum strap might have to be located much higher than on a man.


Make sure your shoulder straps come out of the back, go up a tiny bit and then over the shoulder and down.  Too much up on the shoulder strap and the pack is too small in the back length.  No curve there or worse yet the shoulder straps going down over your shoulder and the pack is too big in the back length.

Classic case of too small of back panel for my physical size and too short of pack straps.
There is no way to make this pack fit me.  I'd be much better off with a longer pack instead of longer shoulder straps.  But note that the waist belt and bottom of the pack is in the right position.

I am actually climbing here in the same pack.  The problem would seem obvious although the pack is reasonably comfortable because I am not carrying a lot of weight.  (although I carried 3 days worth of food/gear on this trip) But really no matter how cool I think this pack is, for me this one sucks because of the limited back panel and shoulder strap sizing.  A 17.5" back panel is never going to fit my 21" back.


Even with the lid off this is a much bigger pack than the green 27L pictured but more importantly a much better fitting pack for my body size.  It is also much easier to climb technical ground with or ski in.  A better picture of my personal  pack fit.  It may not be perfect but it is very close.  The waist belt is not buckled which allows me to play with the pack's fit and shoulder straps in this picture.

Don't try to put you size 11 feet in a size 6 shoe!

More importantly don't let some lame ass salesperson or pack maker do it for you!
This isn't rocket science folks.  But neither is it easy to get a really good fit.  Packs have been used for millennium, the more simple they are generally the easier they are to carry.  Find the packs that fit you the best and then make side by side comparisons to others of similar back panel size.

Only your boots should take more fitting than you climbing pack.   Both will make the difference between relative comfort and an unpleasant trip.

In the day of technology and a "app" or every application you are FUBARed if you think of climbing packs in that contact.  The weight in any pack is best carried as close to your back as possible for comfort and balance.  Modern ice tools and crampons can easily go inside these packs.   I do it all the time with Nomics and Dartwins and have yet to damage a pack in the last 3 or 4 years.  I seldom use a lid on a pack but like the option of adding one at will.  

Super light and super tough fabrics are cool.  Most of my packs are made from one form or another.  But it saves mere ounces on even the lightest packs.  It is the suspension and foam pad that are the biggest percentages of weight.  Start adding whistles and bells and the actual  pack material will have an even smaller effect on the over all weight of the pack. 

Soft frame climbing packs have a big margin of error for sizing.  If you are within the norm you should easily be able to find a decent pack in this size range that will fit you.  If not make sure your pack maker or the production pack you want actually fits.  I am  6'1"  but I have a really long back for my body size.  I am 21" from base of neck to top of my hips.  It is not the norm.  I also have a 44" chest when I am in decent shape.  That makes a long pack back with longer shoulder straps fit me better.   Having a good range of travel for my sternum strap makes it more usable as well.

Common sizing info..this from CCW:

"Back sizes are determined by measuring from the tip of the hip bone to the prominent cervical bone near the base of the neck. This is the standard measurement used throughout the industry. Figures given next to each model on the product page correspond to this approximate measurement, not the actual dimensions of the pack. In general, though, our size medium/regular fits people 5'7" to 5' 10" while a large fits those over 5' 10". This varies, as torso lengths vary from person to person. Our packs have non-adjustable harnesses. "

this from Wild Things:

Finding Your Pack Size (Torso Length)


Finding the right pack size for you relies on your torso length, not your height. To find your torso length have a friend measure your spine, using the steps below:


  • Find the most prominent vertebrae (C-7) at the back of your neck (tilting your head forward helps). It’s the large bump at about the same level as the top of your shoulders.
  • Find the top of your hipbone (the iliac crest). Follow this point around in a straight line to your spine.
  • Stand up straight and lay a flexible measuring tape directly against your spine. Measure the distance between points 1 & 2.

Pack Sizing Information


S M L
Torso Length 18 19 1/2 21


Measurements refer to body size, not pack dimensions, and are in inches.

 
The single most important thing you need to know on your climbing pack is DOES IT FIT? 

                       PART TWO and Three of Climbing Packs

For part two and three of this series I'll discuss quality of manufacture, the required accessories, fabric choices and over all pack weight.


Pictured here are the same packs cut from different fabrics.


Tuesday, April 3, 2012

More on Tech bindings?

What I envision is a real mtn boot that will take tech bindings and a crampon that is fit to the boot in the same way.


1/2 the equation by several manufactures but no follow through yet.  All it takes is time and money!

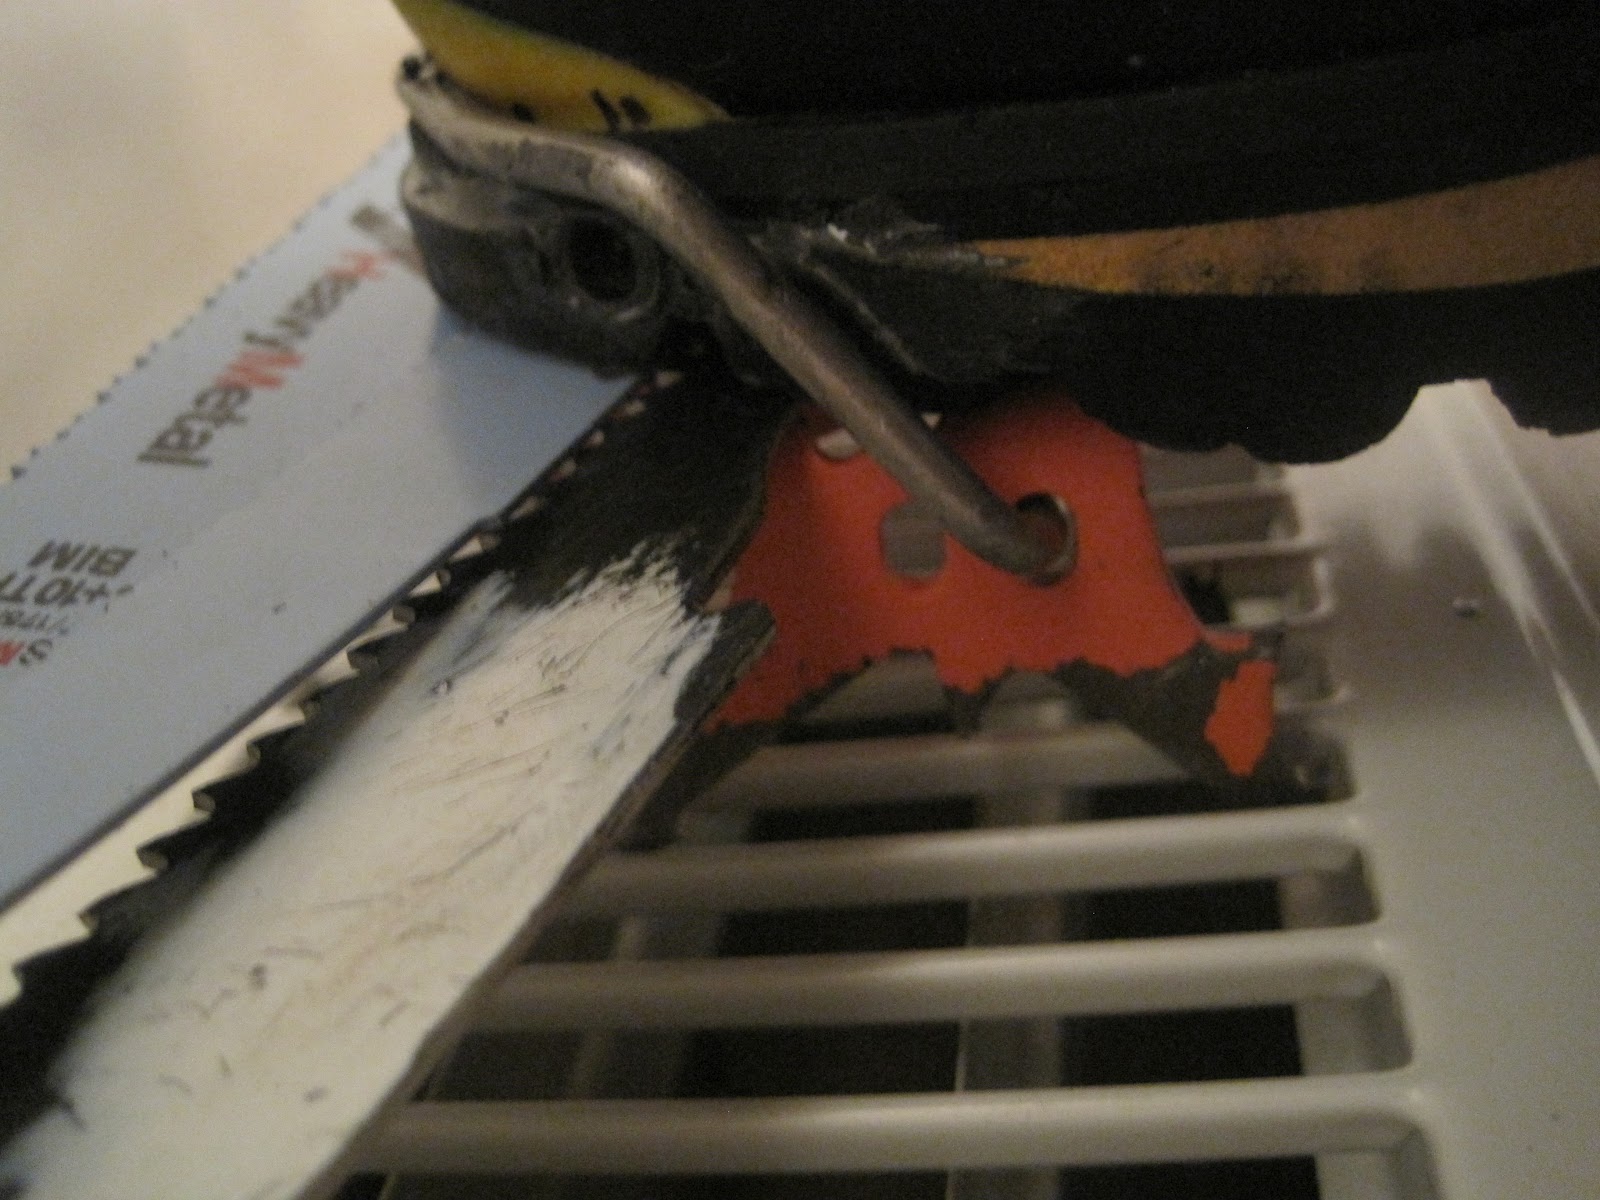
It is about time! Tech fitting on a Spantik!


A Dynafit tech binding toe piece added to a Spantik at home!

Bravo!  Looking forward to the field reports!  The info is much appreciated.  Hopefully others will be able to follow shortly.  Including La Sportiva :)


"I live and climb in Alaska which typically requires longish approaches and the use of skis. I have been using the standard silvretta bindings on a set of Atomic Climber skis (pretty light). I have wanted to use dynafit toe pieces on my Atomic skis for a while now and after my DPS Wailer 112 came in lighter than my "approach setup" I decided I had to try something.

 Long story short I have bolted/glued the tech fitting plate I cut out of a pair of old Garmont Megarides into my well broken in pair of Spantiks. I'm working on mounting dynafit tlt speed toe pieces and a custom heel throw system (using a crampon wire heel latch). I haven't had time yet to  build/test this system, but I will as soon as I get home in a week and a half.

Have you heard of anyone doing this before? Do you/they have any tips or suggestions? I'm realize not everyone would utilize tech fittings on climbing boots, but the crowd I run with in Alaska are surprised no climbing boot manufacture has thought of this yet. Thoughts?

Just wanted to say thanks for being an inspiration to build and try new things.
 I appreciate your time and the sharing of your knowledge."

"I'm reluctant to take them on a long trip right away until they prove there reliability, so I'll start with a couple of short (4+ mile) approaches in variable snow conditions most involving trail breaking.
I don't have the heal piece assembled/made yet but I think I have an idea of what I'm going to do. I'll start on that when I get home next week also.

My most recent climbing trip(that turned into a ski trip) was into the Eastern Alaska Range involving 78 miles on snowmobile and 15+ miles on skis pulling sleds to where we setup a base camp. From there we toured around the West Fork of the Susitna glacier logging 60+ miles. It would have been really nice to have a lighter weight setup than the silvretta 404's I had for that trip though I was unwilling to trust this system having not put it through the wringer. Time will tell."

Sunday, April 1, 2012

The Bigger Picture?


I get a lot of email here from climbers just beginning to get out and get serious about their own technical climbing.  Over the last week I had a conversation with my climbing partner about the "bigger picture" and our own personal climbing objectives.

Neither of us likes crag climbing in particular.   Truth is, like most of us we'd rather be in the mountains.  The flip side to that is it takes a LOT more effort to get out in the mountains and get somethings done.  As in something actually climbed.    By this time of year, every year I have usually had a full belly of  frustration with the bad weather and the dangerous avalanche conditions.

We came up with a less than 50% percentage of successful trips  compared to what we have actually attempted in the mountains.  Alpinists are a hardcore and stubborn tribe!  Attributes I can admire even if I don't always possess them.  By this time of year I can more easily turn to rock climbing and riding my road bike.  I hate beating my head against the climbs I still want to get done before the temps soar and the snow and ice disappears for another year.  My lack of  motivation can be telling this time of year.  But it is also the time of year I most want to get my alpine projects done.

One of the many discussions we had this last week was the difference between crag climbing and actual alpinism.  From that discussion and the local conditions we were experiencing the conversation split into several topics.  One of the most interesting topics to me was how I end up labeling "little picture" and "big picture" climbs.

Hopefully what I relate from those conversations my help others sort out their own projects.

"Little picture" climbs in the context of Cold Thistle and Alpinism are generally crag climbs.  Climbs that are close to the road, little objective danger and generally (but not always) at the upper limit of one's technical skill level.   Little picture because you really don't have to concentrate on much past how hard the climbing is, what gear will I need and how will I get back down.

Small picture climbs generally allow you to make huge errors in judgment and the gear selection with little consequence for the mistake.  It is a great place to learn from mistakes.

The ice climbing in Ouray and Cody will generally fall into this category.  As will most of the top roping and smaller cragging areas around the country.    But there are "big picture" dangers any where it snows.  Ice always falls down when it gets warm or cold enough.  Bozeman at any given time gets snow and wind as can Cody.  There is no easy label when it comes to ice climbing. 

Hafner and Johnson Canyon are other "little picture" climbing areas.  The places you might head when the overall conditions are dismal in the Canadian Rockies.

Alpine objectives in the Canadian Rockies are not "little picture".   When it snows, the wind blows, or there is a radical temp change there, the actual technical difficulties will mean almost zip.  What really matters in Canada and the Alps is what might drop on your head at any given time,  It might well be rock, ice, lightening, rain or snow!   The climbing might well be "easy" by comparison.

If you spend enough time out you get to know what the real time picture is for your own objectives.  Small picture or Large picture?    Some climbing areas might be little picture in summer  (few issues that need to be on your mind but the actual climbing) and big picture (a laundry list of objective dangers) in winter.  The "picture" and what is required of you mentally can change by season or be the same year around.

It is easy to come from a strong technical back ground and jump into "small picture" objectives safely.

"Big picture" objectives on the other hand might well have little patience for strong technical climbers without the ability to process all the issues alpinism will eventually require.

The climbs that I generally see turn onto epics are where the climber's technical abilities get over whelmed by the bigger picture of the climb's objectives dangers.  That in turn forces the climber into a mental and physical state of tunnel vision.  Call it "sketched out".  But things go bad quickly when it happens.  Once you are forced to deal with the world via tunnel vision it is very easy to over look the environmental details that define your safety and well being on a big climb.

I think it is better to first label and then study your climbs.  Note the avi terrain on the approach and decent.  What are the snow conditions you want as compared to what you have.  What is the hour you want to be up and off the climb?   Will conditions allow you of attain your goals?  What is your plan if you can't maintain your time schedule?

There is a reason we look for "perfect conditions".  Perfect conditions make our climbs easier on the approach, decent and the actual climb.  Perfect conditions make the picture smaller.

What I learned, again, from the conversation is not to let anyone or any one climb over whelm your ability to appreciate the "picture" fully.   If something "feels" wrong, it generally is. Don't let your inability to articulate what is wrong stop you from making good decisions.  The mountains have been there a long time.  They aren't going any where.

Postscript:

I suspect it has something to do with the conditions in Canada last week but it is worth checking out Will's recent comments as well.  Same idea, different voice.

http://willgadd.com/?p=668

Friday, March 23, 2012

Polartec Neoshell "Soft"? The real game changer?

Out of the box and onto the ice.  The first Neoshell "Soft" garments from NWAlpine.
NWAlpinist Salopettes and a Big 4 climbing jacket.


Last fall we were having a discussion here about soft shells as I was trying to source garments for an up coming review.  I had used the Westcomb Polartec Neoshell Apoc hard shell jacket and had been impressed with the performance in every condition.  Other Neoshell "hard shell" garments followed.  All equally impressive for performance as a hard shell that had a little stretch added.  They did breath well.  No doubt about that!

The first I heard of the newest Neoshell "soft" was from a reader here at CT.  Not believing the comments actually I searched out the only two garments that were being produced at the time, one from Marmot and the other from Mammut. 

I seldom really try to get garments for review and tests.  But these two I REALLY did try to obtain but to no success.  No pro deals, no freebees or demo loans were going to happen.  And at $400 and $500 retail per garment I was stuck.  No money for this one!    I didn't have the money for that kind of test on something I really figured wasn't going to be all that impressive anyway.  Love the blog and finding new groovy gear for my on use but throwing down close to a grand in short order wasn't going to happen.

Little did I know. (which seems to happen on a regular basis writing a climbing gear blog)

After giving up on the usual suspects for getting any deal on the newest Neoshell I went to the source.  Polartec of course!   RA you know who you are and I want to sincerely "THANK YOU!" 
Best "new" product for 2011 imo.

In short order a couple of yards of the newest material, I like to call it Neoshell "Soft" was on the way to my "local tailor", Bill Amos the owner of NWAlpine.   No clue what this stuff is really called.
My reasoning behind my manic behavior (this time) was I wanted a warmer pair of NWAlpinist Salopettes.   Way more a "want" thing than a a "need" thing in this case.  And to be honest I wasn't expecting much.  I have lots of nice climbing pants.  And they reall yare warm enough.   What else was I going to get to play with?  MWA's climbing specific jacket called the "Big 4" was sew up with Neoshell SOFT at the same time.   In this case what I got was a total surprise!

Here is a short comment prior to a full review and comparison coming in April.

"Compared to the three versions of Arcteryx pant fabrics and the current NW Apline fabric the Neoshell SOFT is the warmest and most breathable but least stretchy.   But it is just stretchy enough for pants, salopettes or a shell top.  And as tough or tougher than most fabrics I have mentioned and not any heavier. May be not the best material for warmer weather use though from what I have witnessed so far.  But then again smart garment design work would solve that problem as well I suspect.

My NWA salopettes are 1# 6oz in the NWAlpine fabric which Arcteryx also uses. It is a lwt to mid weight very stretchy fabric which isn't very durable in the long run.   Same salopette is 1# 5oz in the Neoshell soft which is much warmer, water proof, very breathable and no question more durable.
And I find the Neo Soft more comfortable to wear.

I have both a NWA Big Four Jacket and the Alpinist Salopettes in the Neoshell SOFT and will be doing a full review and comparison on the blog in April after the next trip north.

Short version? The Neoshell SOFT garments are changing the way I dress for winter climbing and the physical comfort level while doing so. All while wearing less and being better protected from any weather.

And it was not easy to get me off that dime.

Big claims I know but true to date.  I have used a few of the current state of the art soft shell tops.  And 3 of the hard shell Neoshell garments and been impressed with all of them,   Currently I think the Neoshell SOFT is THE fabric that will change how we dress for cold weather climbing.

More to come in April.


NWAlpinist Salopettes in Neoshell "Soft" and lovin them 


Both versions of the NWAlpinist Salopettes on the walk in.


Wednesday, March 21, 2012

Sobering or it should be anyway...

By Angus M. Thuermer Jr., Jackson Hole, Wyo.

March 21, 2012


The route two skiers chose during an excursion near Ranger Peak on March 7 was a key factor in them getting caught and killed in an avalanche, park rangers said Tuesday.

Steve Romeo and Chris Onufer died after being swept nearly 3,000 vertical feet. The two likely were headed to an unskied south-facing couloir above Waterfalls Canyon in Grand Teton National Park that Romeo had eyed over the years, rangers and a friend of Romeo’s said.

Romeo and Onufer’s ascending ski tracks led to that goal, rangers who investigated the avalanche deaths said. The route they chose took them from the edge of an avalanche path into its starting zone, which was the ideal steepness for slides, rangers said.

“They chose to go up a known avalanche path ascending into an avalanche starting zone,” Jenny Lake Ranger Rich Baerwald said.

The incident should spur backcountry skiers to learn about avalanches and reassess the way they make decisions about taking risks, he said. Skilled skiers and moderate danger can be a deadly combination, rangers said.

Many people who read Romeo’s popular TetonAT ski blog looked to him “as the subject-matter expert,” Ranger Chris Harder said.

While Romeo skied radical terrain with elan, he also posted several videos and wrote stories about getting caught in or nearly missed by avalanches.

“I don’t know if he was taking that to heart,” Harder said. “He had more [encounters] in the last few years than I’ve had in my lifetime,” the 30-year Teton veteran said.

“I feel pretty strongly a lot can be learned by this,” Harder said.

Neither skier told anybody of his exact plans, rangers believe.

“What their ultimate objective for the day was, we will never know,” Harder said.

Piecing together information from the ascent track and from friends Romeo and Onufer talked to before leaving, investigators put together a likely scenario for the accident.

Romeo and his sometimes ski partner Reed Finlay had talked about skiing a couloir west of the avalanche path — on a spur of 10,355-foot Ranger Peak.

“It’s a really nice line, a pencil-thin, straight shot.” Finlay said Tuesday. He and Romeo last saw it together Feb. 4 while on Eagles Rest Peak.

Finlay couldn’t return to the area. His wife, Rebecca, gave birth to firstborn Kershaw on Feb. 29.

The ill-fated skiers were scheduled to depart Colter Bay at 7 a.m., rangers said. Across the lake, the slope the two ascended was “a big avalanche path,” Baerwald said.

“It narrows down from a big basin to gullies chutes and rock bands — it’s hourglass-shaped,” Baerwald said.

Climbing the avalanche path with skins on their skis, Romeo and Onufer initially made the best of hostile country, Baerewald said.

They stuck to the climber’s right, near where cliffs form the edge of the slope.

At an elevation of about 9,700 feet, they made a critical decision.

“They start making their way away from the edge of the avalanche path on into the avalanche track and into the starting zone,” Baerwald said.

Added Harder, “If they were heading to that [pencil-thin] couloir, they probably short-cut over to it.”

An alternative would have been to continue up the right side of the slope, rangers said. This route was less steep and led to a ridge.

“The ridge would have been a safer route,” Baerwald said. Ridge safety is a basic concept, he said.

“The message with regard to route-finding is, it’s super important terrain be considered,” he said.

A rising traverse and switchback brought the pair to a slot between two triangle-shaped cliffs in the middle of the basin. Here the slope steepened to about 40 degrees, the classic angle for slab avalanches, rangers said.

It is likely this is where the two triggered the slide. The crown, up to 3 feet deep, indicated the avalanche entrained snow that had been falling and drifting from five days of storms. In that period, 28 inches fell in parts of the Tetons, the Bridger-Teton National Forest Avalanche Center reported.

Significant wind carried that snowfall to lee slopes, rangers said, including the fateful basin on Ranger Peak’s spur. Southeast facing, its orientation catches drifting snow carried by prevailing winds, they said.

Once the skiers provoked the slide, nothing could have saved them, rangers said. The avalanche ran a linear mile over cliffs and rocks.
It likely propelled them at speeds between 60 and 80 mph, rangers said. It ripped off one skier’s pack, another’s boot, all four skis.

Searchers found the base layers of one ski ripped from its top plate, its climbing skin still attached.

“The ski was completely delaminated, separated,” Harder said. “Speaking to force, that says a lot right there.”

The chaos likely tore Romeo’s helmet off his pack, and it “sustained a lot of damage,” Harder said.

Romeo had an Avalung pack — a device designed to allow avalanche victims to breathe if buried. Its mouthpiece was deployed, but rangers couldn’t tell whether he had it gripped in his teeth during the slide, they said.

Friends of the two have asked whether avalanche airbags could have saved them, rangers said. Airbags are stowed in backpacks and deploy instantly with the pull of a toggle. They help suspend a skier high in flowing snow and help prevent burial.

But neither skier was really buried, rangers said.

“Chris probably could have sat up,” had he been alert or alive, Harder said. “Steve probably could have wrestled an arm out.

The Teton County Coroner ruled the cause of death was blunt-force trauma.

Buffalo Fork Sub-District Ranger Rick Guerrieri said no gear could have helped.

“One piece of equipment wasn’t going to have any effect on injuries,” he said.

Added Harder, “The best tool they had with them, they weren’t using the most. That was their brain.”

Rangers discounted other skiers’ sentiments about the pair being in “the wrong place at the wrong time.” Such phrases are best reserved for victims of meteorite strikes, they said.

“This [event] had factors in it that [include] decision-making,” Harder said of the avalanche. Rangers are uncertain to what extent the pair took into account the snow and winds.

Avalanche forecasts from the center called the chance of a slide moderate. The predictions range only to 10,500 feet.

Search leader Guerrieri would not call the pair’s decisions a mistake.

“Different people are willing to accept different levels of risk,” he said. “I hate second-guessing people.”

Backcountry travelers need to ask themselves what the consequences of taking a risk might be, Harder said. In this instance, had the avalanche been witnessed from across the lake and a rescue mounted within 10 minutes, the outcome would have been the same.

“They died instantly, it’s pretty safe to say,” he said.

Even with working cellphones and helicopters at the ready, an injured skier would be lucky to get from the Tetons to a hospital within three hours, Harder said.

Decision-making is an increasing part of avalanche education, Baerwald said. A study widely cited in recent years indicates that skiers and snowboarders discard caution in the face of social considerations that range from the lure of untracked slopes to a commitment to reach a goal or even familiarity with a slope.

“Taking an avalanche course is critical, even late in the season,” Baerwald said. Education can help skiers understand what an avalanche forecast means and provide other lessons, he said.

“There was some decision making that factored into the accident,” Baerwald said. “Route choice — that’s the one that stands out the most.”

Post script by the editor @ Cold Thistle:

This statement from the article above should stand out to everyone imo:

“I don’t know if he was taking that to heart,” Harder said. “He had more [encounters] in the last few years than I’ve had in my lifetime,” the 30-year Teton veteran said.

In my 40 years of back country, area skiing and winter alpinism the VAST majority of friends I have lost had been in avalanches previous and then eventually died in avalanches.

It is NOT a numbers game.  It is a choice you make every time you venture into avi terrain.   Start disregarding your fear and you will make the wrong decisions.
None of my friends were total back country snow dummies.  All knew the risks we take.  But all made fatal errors...usually more than once and only survived the first few incidents because of pure, dumb luck.  Harsh?  Sure it is. But easier to tell you now than remind you at your own funeral. 
How many funerals do you need to attend before the point is driven home?

Snow safety is not  rocket science.

The next time you ski or walk into dangerous terrain ask yourself, "is it really worth the risk today?"    "Overs" in this game are hard to come by.  Gear will never replace the high tech shit between your ears.  Everyone has the same gear there but you have to be willing to actually use it.

Double click to enlarge the terrain photos of the accident area below.


Tuesday, March 20, 2012

Come on! Why aren't these still being made?


La Sportiva?  Dynafit? Scarpa?  Kolfach?   Come on guys it is about time someone reinvented the wheel here again !  I'd buy a pair in a heart beat!  This is the 2005 Dynafit Mtn LT Model.  Was it ever produced in any numbers?  Ever imported to the US?  Any of the readers here still have or used a pair?

I want a pair!  And I don't really care who makes them.  Just give me an inner boot I can heat mold and I am good to go.  2.5 # per boot please in a size 45/ US 12.

This would seem to be a no brainier for the boot makers.